
🦠 Bacteria Prevention
📅 Updated for 2026
How to Clean Breast Pump Parts – If you ask an exclusively pumping mother what her least favorite part of the journey is, the answer is rarely the physical act of pumping.
The true nightmare is the endless, soul-crushing cycle of standing at the kitchen sink, scrubbing tiny plastic valves and silicone flanges eight times a day.
Because breast milk is so incredibly rich in fats and sugars, it is the perfect breeding ground for bacteria. If those tiny microscopic grooves in your pump aren’t cleaned properly, old milk residue can spoil, leading to sour-smelling bottles, thrush, or even severe infant stomach infections.
Knowing exactly how to clean breast pump parts efficiently—without cross-contaminating them with your dirty dinner dishes—is a vital skill that will save you time and keep your baby safe.
Let’s break down the official CDC cleaning steps, compare the best sterilization methods, and finally address the highly debated, time-saving trick every mom is whispering about: the “Fridge Hack.”
The 5-Step Official Cleaning Routine
You cannot simply toss your pump parts into the sink alongside yesterday’s spaghetti plates. The grease and bacteria from food will cling to the porous silicone.
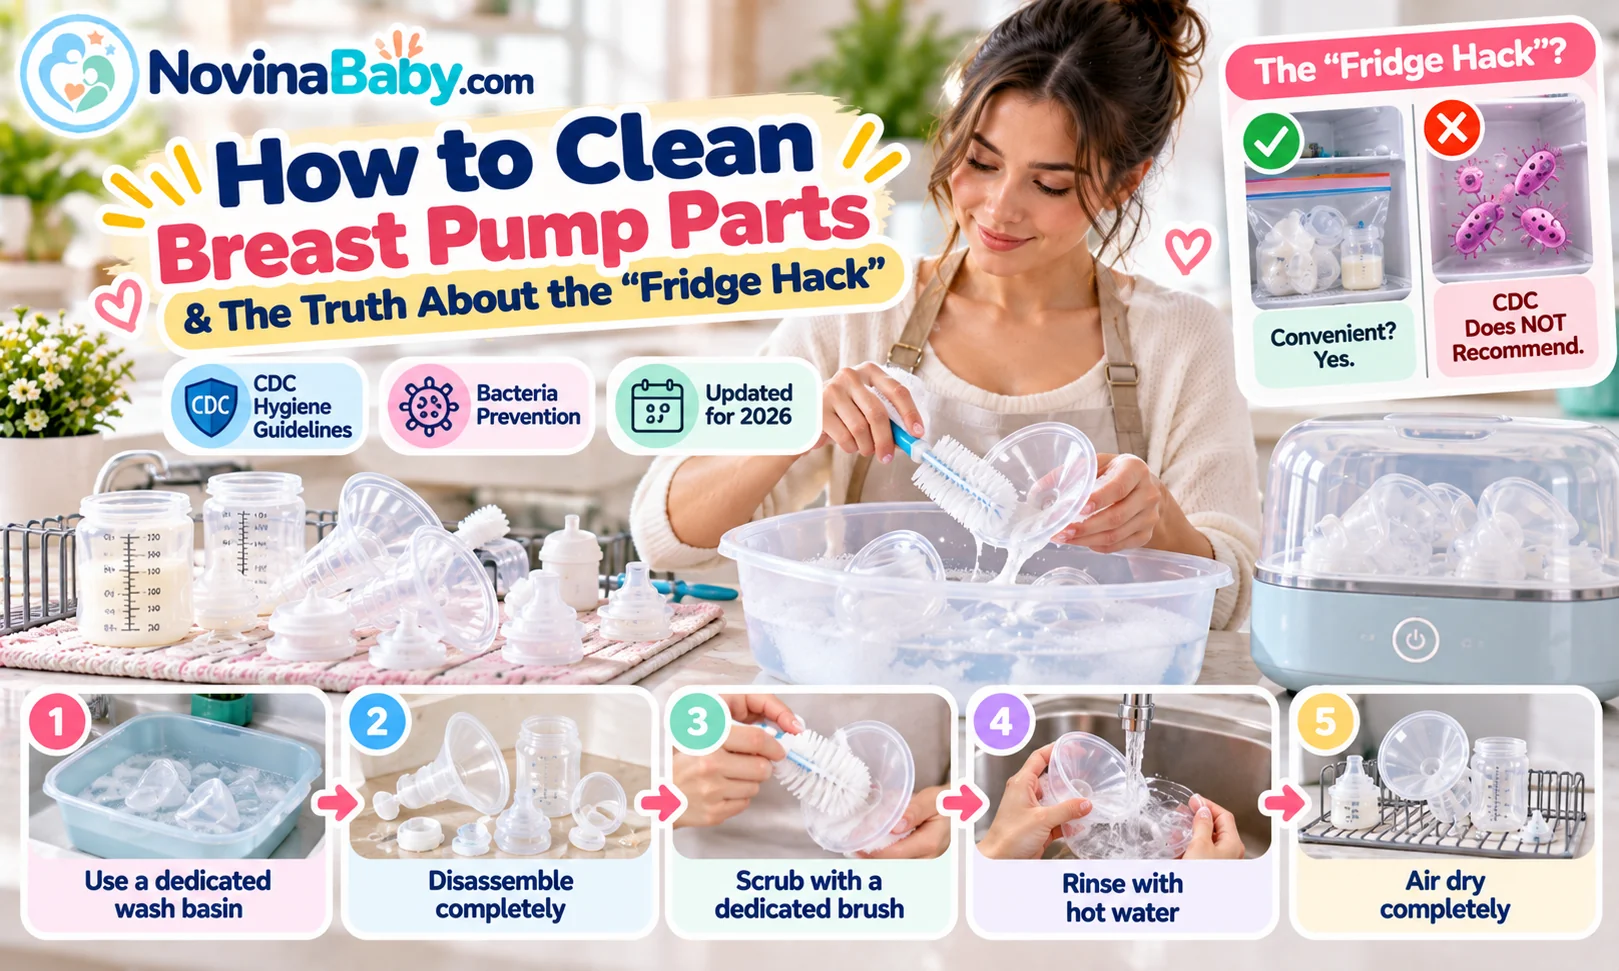
To safely execute how to clean breast pump parts, follow this dedicated 5-step process:
Step 1: The Dedicated Wash Basin
Never wash pump parts directly in the sink bowl (sinks harbor massive amounts of bacteria). Use a dedicated, clean plastic wash basin used only for infant feeding items. Fill it with hot water and a few drops of unscented, plant-based dish soap.
Step 2: Disassemble Completely
Do not wash the flange and the duckbill valve while they are attached. You must take every single piece apart. Milk fat hides in the tight crevices between connected plastics.
Step 3: Scrub with a Dedicated Brush
Use a soft, dedicated baby bottle brush. Never use the same sponge you use to clean your cooking pots. Gently clean the hard plastics, but use extreme caution around the delicate slits of the silicone duckbill valves so you do not tear them.
Step 4: The Hot Water Rinse
Hold the parts under running water, or submerge them in a second basin of clean, fresh water to remove all soap residue. Scented dish soap left behind will make your milk taste terrible to the baby.
Step 5: Air Dry Completely
Do not use a cloth dish towel to dry the parts (towels trap germs). Place them on a clean, dedicated drying rack or paper towel. Parts must be completely bone-dry before you reassemble them, or mold can grow in the trapped moisture.
Washing vs. Sterilizing: What is the Difference?
Washing removes the physical milk fat and visible dirt. Sterilizing (or sanitizing) uses extreme heat to kill the microscopic bacteria left behind.
The CDC states that you must wash parts after every use, but you only need to sterilize them once a day (if your baby is a healthy, full-term infant over 2 months old). If your baby is premature or immune-compromised, sterilizing after every use may be necessary.
Here is how the top sterilization methods compare:
| Sterilization Method | Pros | Cons |
|---|---|---|
| Boiling Water (The Old School Way) | Free, highly effective, requires no extra gadgets. | Time-consuming. Rapidly degrades silicone parts, causing them to tear easily. |
| Microwave Steam Bags | Takes only 3 minutes. Perfect for sterilizing parts at the office or on vacation. | Parts remain soaking wet; requires a long air-drying time before next use. |
| Electric Steam Sterilizer & Dryer | The gold standard. Steams to kill 99.9% of germs, then actively blows hot air to dry them perfectly. | Expensive and takes up a large amount of counter space in the kitchen. |
The “Fridge Hack”: Is It Actually Safe?
If you are pumping every two hours, the idea of washing parts 12 times a day is physically impossible. This led to the viral, unspoken rule among mothers known as the “Fridge Hack.”
How the Hack Works: After you finish a pumping session, instead of washing the flanges and bottles, you place the entire assembled unit (unwashed, with milk droplets still inside) into a Ziploc bag or wet bag and put it directly into the refrigerator.
The logic is that because breast milk is safe in the fridge for 4 days, the few drops left on the plastic flanges are also safe, pausing bacterial growth until you pump again 3 hours later.
Frequently Asked Questions (FAQ)
Can I wash breast pump parts in the dishwasher?
Yes, most hard plastic flanges and bottles are top-rack dishwasher safe. However, the harsh detergent and extreme heat will destroy delicate silicone valves very quickly, and the silicone will absorb the smell of the detergent. Hand washing is highly recommended for longevity.
Do I need to wash the plastic tubing?
If you are using a modern “closed system” pump (like a Spectra or Medela Pump In Style), breast milk never enters the tubing. Therefore, you do not need to wash the tubes. If you see condensation inside the tube, simply run the pump motor for 5 minutes with the tubes detached from the flanges to air dry them.
How do I get rid of the cloudy film on my plastic parts?
That cloudy film is a buildup of hard water minerals and milk fat. To remove it, soak the parts in a mixture of half white vinegar and half warm water for 15 minutes, then scrub gently and rinse. The acid in the vinegar cuts through the mineral buildup instantly.
Need a Pump with Easier-to-Clean Parts?
If knowing exactly how to clean breast pump parts feels overwhelming because your machine has too many tiny crevices, it might be time for an upgrade. We’ve rigorously evaluated the market for the easiest-to-clean hospital-grade motors and minimalist wearable cups.